What is AMS?
AMS is a self-serve online advertising platform to promote the products available at amazon.in. E.g. HP Tablets can use AMS to drive more traffic towards their product thereby making more sale. Brand who does not have account in amazon may not be able to use AMS so the first step is to be get registered and then apply for AMS.
Why to use AMS?
Almost every platform has their own ad serving platform which can be used to run ads on the complete inventory they have, the popular example is Facebook. So by using AMS we can target the relevant users coming on amazon.in. You can also expertise on amazon FBA which is quite beneficial in making brands, the best route would be amazon FBA training as first step.
Now as we know what AMS is and why do we use it, let’s know the working step by step:
STEP by STEP Process:
- STEP 1: Open Link: https://ams.amazon.in/
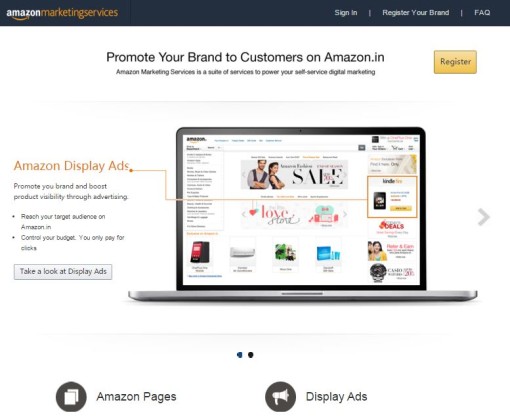
- STEP 2: We need to get registered by clicking on the Register button on the right top corner and if you already have sign in details please fill to get started.

- STEP 3: Once you successfully sign in, we reach to below page where we get two option:
- Create Amazon Page
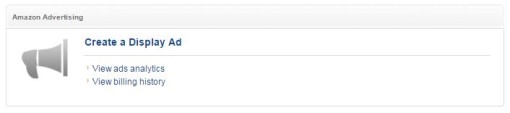
- Create a Display Ad
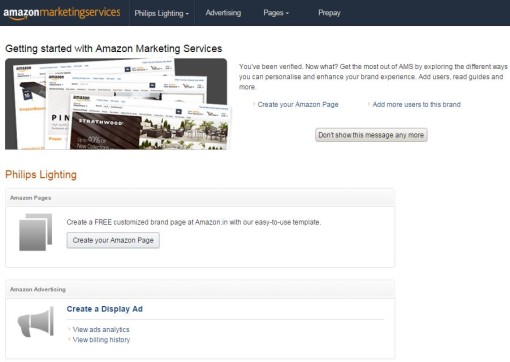
- STEP 4: Let’s start with creating ads on AMS, we click on Create a Display Ad
- STEP 5: Click on the create ad takes you to two option
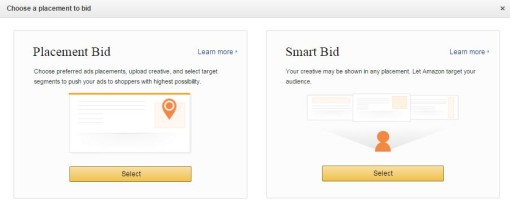
Detailing both the option:
Placement Bid- We go with the placement bid when we need to optimize each and every placement, this option is always recommended when you need to deep dive into each ad’s performance
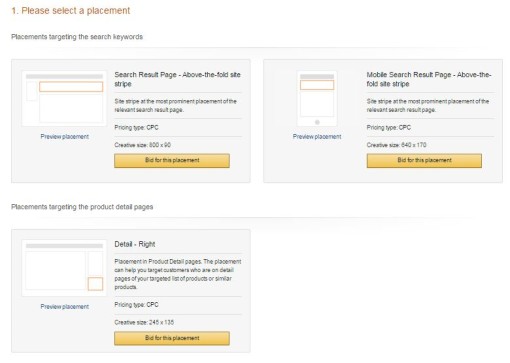
Available placements are:
- Placement targeting the search keywords
- Placements targeting the product detail pages
- Detail – Right – 245×135
- Placements targeting the interest
- Gateway-bottom right – 300×250
- Search Result Page – Left hand tower – 160×600
- Search result page – bottom site stripe – 728×90
- Deals Page 1 – 728×90
- Mobile Deals Page – Above-the-fold – 640 x 100
- Mobile Detail Page – Below-the-fold – 640 x 100
- Check-out thank-you Page – Above-the-fold; right-hand-side – 300×250
Smart Bid – This option is selected when advertiser wants Amazon to manage the placements, only one line item is created in this option.
- STEP 6: Let’s go with smart bid option to show how ads are created in AMS. We just have eight sub steps to complete and we are ready to go live post approval by Amazon
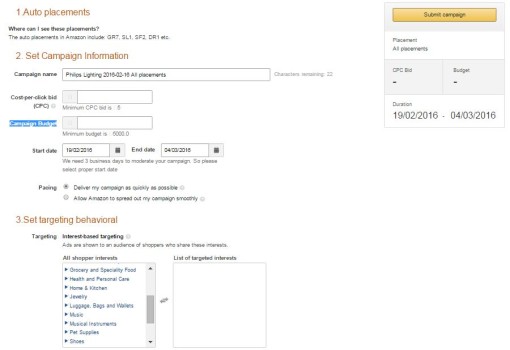
- Campaign Name – Here we write the campaign name(character limit is 64)
- Cost-per-click bid – Bid value is mentioned where minimum threshold is RS 5
- Campaign Budget – Total budget to be spent on AMS
- Start End Date – Campaign Duration is selected
- Pacing – We need to select pacing option of the campaign out of two i.e. Quick Delivery or Smooth delivery
- Targeting – We select the user targeting based on shopping interest, e.g. if we select Home & Kitchen as target, the ads will be shown to only those user whose behavior is searching home products in Amazon
- Set Landing Page – Three options we have where we can take the users who click on the banners
- Product Detail Page
- Amazon Page
- Custom Page
- Upload Creative – Finally we upload the creative of required dimensions e.g. 728×90, 300×250, etc. Creative guidelines can be found here: https://images-eu.ssl-images-amazon.com/images/G/31/AmazonBrandStoresPlatform/AdCreativeStandard._CB303985957_.pdf
- STEP 7: Once all the above sub steps are provided, we just need to click Submit when then Amazon will double sure if the setup is proper and once approved by them the delivery starts to happen
- STEP 8: Day on day report is provided in the same interface, we need to click on “View Ads Analysis” which gives information like:
- Start Date
- End Date
- Budget
- Spend
- Impressions
- Clicks
- Purchase Amount
Similarly separate placement bids are created and we get the reports in same way, the only difference we have is with the ads running with search keywords where